If your computer has become painfully slow, freezes, stutters and hangs up frequently, it is likely that it is suffering from High Disk Usage, which is popularly known as “100% Disk Usage” problem in Windows.
There could be various reasons for 100% Disk Usage on a Windows computer, ranging from Background running apps, Outdated device drivers and Corrupted system files to other reasons.
100% Disk Usage in Windows 11/10
In a typical case of this nature, the disk usage on the computer remains constantly high and goes up to 80% to 99%, as soon as any App, Web browser, Excel spreadsheet or Word Document is being used.
This can be confirmed by opening Task Manager and taking a look at the Disk column under the Processes tab.
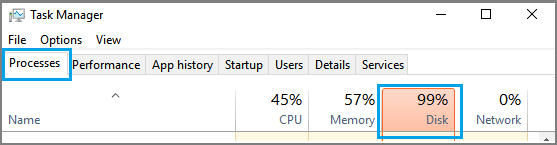
As you can see in the image above, the Disk column is marked red with High Disk Usage (99%), which means the resource usage on the computer has maxed out.
If your Windows 11/10 computer is indicating a similar High Disk Usage, you should be able to fix the problem using the following steps.
1. Disable Startup Apps
Apps like OneDrive and Microsoft Teams have a default tendency to automatically start up with the computer and keep running, even if they are not being used.
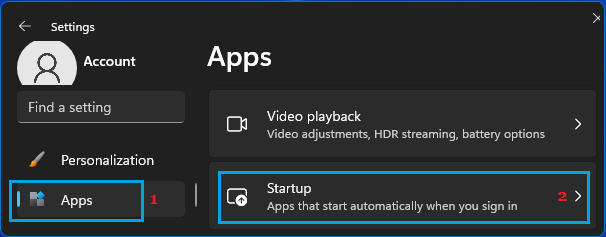
1. Open Settings > click on Apps in the left-pane and then click on Startup in the right-pane.
2. On the Startup screen, disable Apps that you do not want startup with the computer.
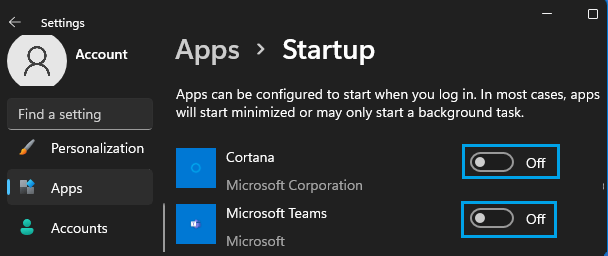
When you restart the computer, the disabled won’t be able to startup with the computer.
2. Disable Background Running Apps
Even if Apps like OneDrive, Microsoft Teams and others are disabled from startup, they have tendency to keep running in background, once they are manually launched by the user.
Hence, it is important that you prevent Apps from continuing to Run in background, even after they have been closed by using steps as provided in this guide: How to Disable Background Apps in Windows 11/10.
3. Disable Tips & Tricks
Disabling or switching off the option to get “Tips and Tricks” from Microsoft can help in reducing the resource usage on a Windows computer.
1. Go to Settings > System > Notifications > scroll down and click on Additional Settings.
2. On the next screen, uncheck the Get tips and suggestions when using Windows option.
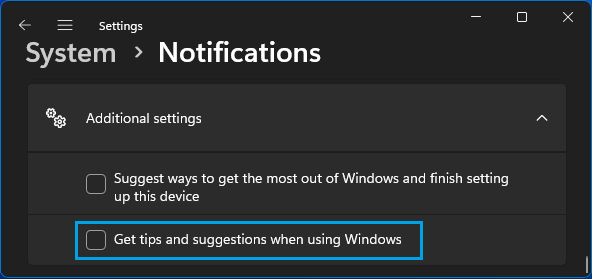
Also, uncheck “Suggest ways to get the most out of Windows…” option.
4. Switch OFF Diagnostic Data
Similarly, disabling the option to send “Diagnostic & feedback” can help in reducing the resource usage on a Windows computer.
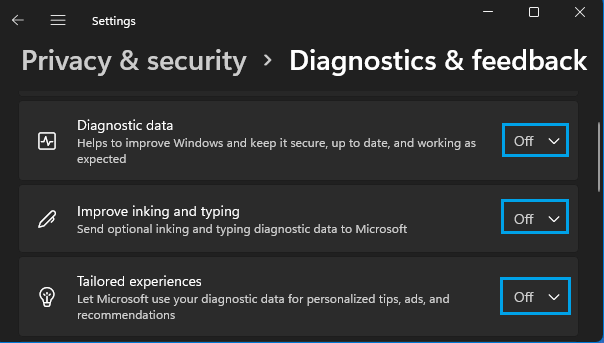
1. Go to Settings > Privacy & security > click on Diagnostics & feedback tab.
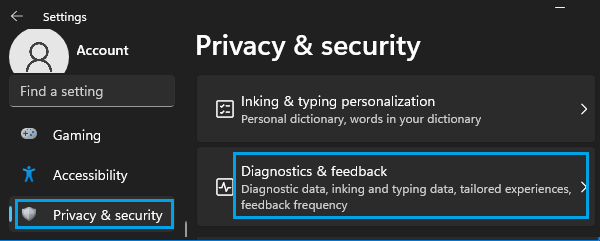
2. On the next screen, disable Diagnostic data, Improve inking & typing and Tailored experiences.
5. Disable Downloads from other Computers
Allowing the computer to download updates from other PCs can lead to high resource usage due to Runtime Broker Activity.
1. Go to Settings > Windows Update > click on Advanced options in the right-pane.
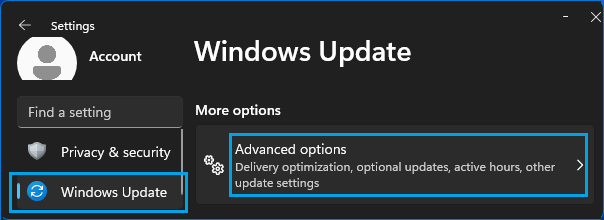
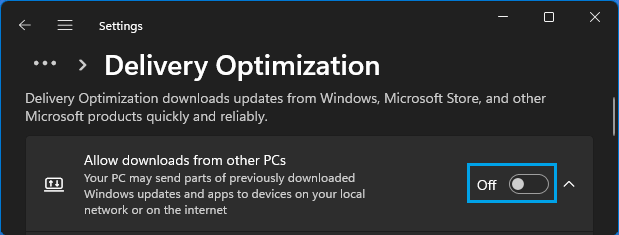
2. From the next screen, go to Delivery Optimization and disable Allow Downloads from other PCs option.
6. Setup Visual Effects for Best Performance
Selecting the option to set visual effects for best performance, instead of being set for best appearance can help in reducing the resource usage on a Windows computer.
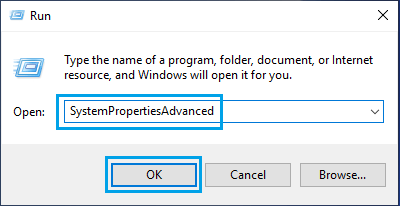
1. Open Run Command (Windows + R Keys).
2. Type SystemPropertiesAdvanced and click on OK.
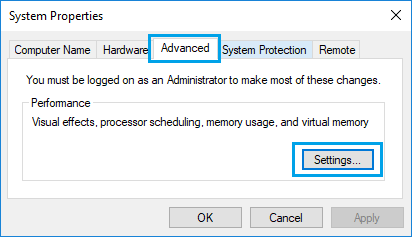
3. On the next screen, switch to Advanced tab and click on the Settings button, located under “Performance” section.
4. On Performance options screen, switch to Visual Effects tab and select Adjust for best performance option.
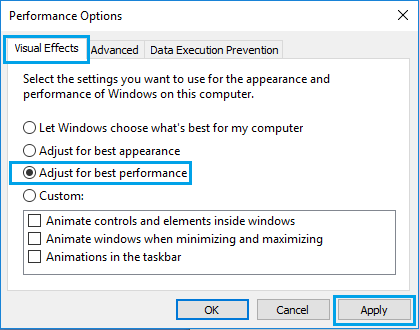
5. Click on Apply > OK to save this settings on your computer.
7. Disable MSI Mode in StorAHCI.sys Driver
If you are facing High Disk usage on a computer with SSD drive, the problem could be due to a firmware bug that prevents SSD drives from completing input/output requests.
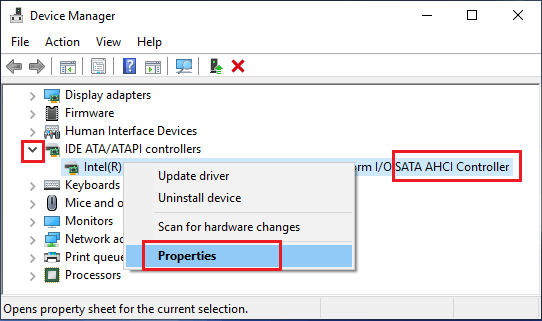
1. Right-click on Start button and click on Device Manager.
2. On Device Manager screen, expand IDE ATA/ATAPI controllers > right-click on Standard SATA AHCI Controller and click on Properties.
3. On the next screen, switch to the Driver tab and click on Driver Details.
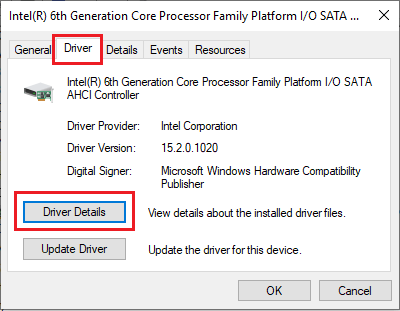
If you see storachi.sys entry on the Driver Details screen, you need to disable MS Mode for the Driver by using Registry Editor as provided on Microsoft’s support page.
8. Check for Malware
The presence of malware can cause a variety of problems on a Windows computer, including the issue of high resource usage.
You can check the computer for presence of malware by using the third-party antivirus program installed on your compurer.
You can also make use of Microsoft’s free Safety Scanner to scan the computer for malware and viruses.
9. Disable SuperFetch
While the SuperFetch feature can help in efficiently loading apps on the computer, it has been associated with High Disk Usage.
For more information and the steps to disable SuperFetch, you can refer to this guide: How to Enable or Disable SuperFetch in Windows 11/10.
10. Check/Repair System Files
The next step would be to rule out the possibility of the High Disk Usage problem on your computer being caused due to corrupted system files.
This can be done by checking the System Files for damage and repairing them (if required) by using steps as provided in this guide: How to Repair Corrupted System Files In Windows 11/10.
11. Check Hard Drive for Errors
Presence of bad and damaged sectors on the Hard Drive can lead to High Disk Usage problem.
1. Type PowerShell in the Search bar > right-click on Windows PowerShell and click on Run as administrator option.

2. On the PowerShell screen, type chkdsk.exe /f /r and press the Enter key.
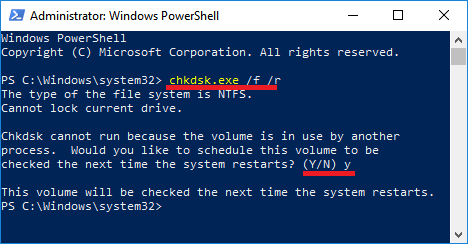
If you are prompted to schedule volume to be checked on next restart, type Y
3. Close the PowerShell Window > Restart the computer and patiently wait for Windows to scan the Hard drive for errors and repair bad sectors (if any).
Note: This process can take a very long time (5 to 12 hours or more).