While the Fast Startup feature can improve the boot up time of computers equipped with traditional HDD drives, its impact on computers using SSD drives is not significant and it can be disabled; if it is causing problems on the computer.
For example, the Fast Startup feature can sometimes prevent the computer from shutting down properly, which can result in open files not being saved and updates that require full shut-down not being installed on the computer.
Also, in case of computers using Dual Boot; users have reported instances of persistent boot loops, data loss and system file corruption due to Fast Startup.
Related: How to Check If Hard Drive is SSD or HDD.
Disable Fast Startup in Windows 11/10
While Microsoft does not You can disable the Fast startup feature on your computer, if it is causing any of the following problems.
- BIOS/UEFI Access: Fast Startup skips the keypress windows, which makes it impossible to access BIOS/UEFI settings.
- Driver/Device Conflicts: Fast Startup can prevent drivers from loading properly; which can lead to connected devices not being recognized and not working on the computer.
- Windows Update Issues: Certain Windows updates require full shutdown.
- Dual‑boot problems: On computers using dual-boot (Windows & Linux), the Fast startup feature can lead to the Disk being locked by Windows; preventing Linux from mounting NTFS.
- Storage Space: The Fast Startup feature makes use of hiberfil.sys file, which can take up a lot of storage space
You can find below the steps to disable “Fast Startup” on a Windows computer by using Run Command, Control Panel and Registry Editor.
1. Disable Fast Startup Using Run Command
The easiest way to disable Fast Startup is by going to the Power Options settings on your computer.
1. Right-click on the Start button and click on Run.
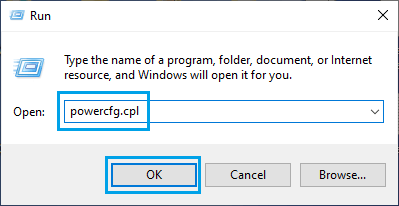
2. In the Run Command window, type powercfg.cpl and click on OK.
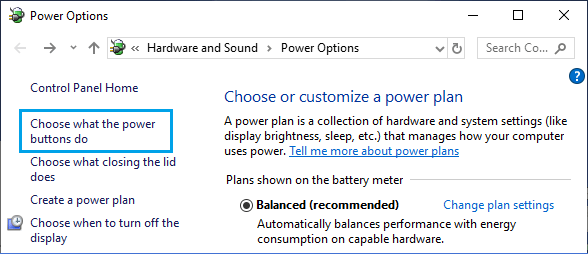
3. On Power Options Screen, click on Choose What the Power Button Does link.
4. On the next screen, scroll down to “Shutdown Settings” and uncheck Turn on fast startup option.
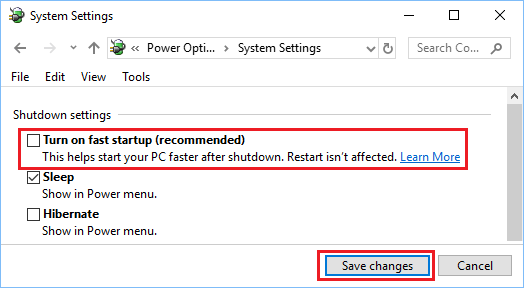
5. Click on Save Changes button.
This will disable Fast Startup feature on your computer, until the next major Windows update.
Note: If the “Fast Startup” option is greyed out, you need to Enable Hibernate mode on your computer.
2. Disable Fast Startup Using Control Panel
If the link to “Additional Power Settings” is not available on the computer, you can disable Fast Startup by using Control Panel.
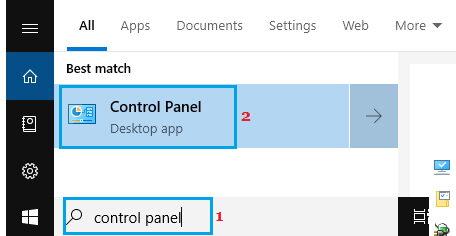
1. Type Control Panel in the Search bar and click on Control Panel in the Search results.
2. On Control Panel screen, switch to Large Icons view and click Power Options.
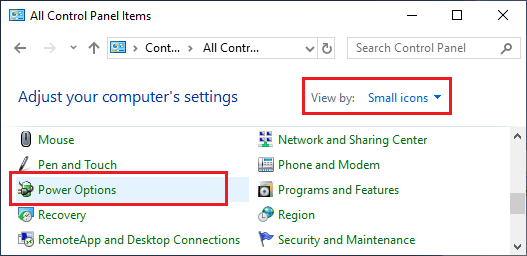
3. On Power Options screen, click on Choose What the Power Button Does.
4. On the next screen, scroll down to “Shutdown Settings” and uncheck Turn on fast startup box.
5 Click on Save Changes to save and implement this change on your computer.
3. Permanently Disable Fast Startup Using Registry
This method should prevent Windows from enabling Fast Startup via an update. It is recommended that you backup registry files before going ahead with these steps.
1. Open Run Command > Type regedit and click on OK.
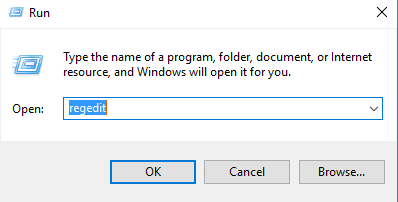
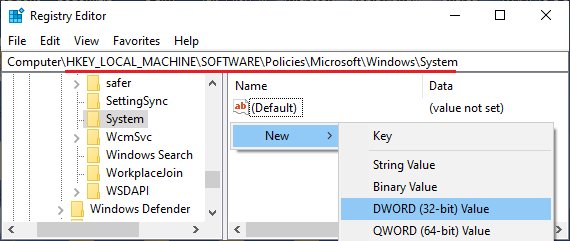
2. On the Registry screen, navigate to HKEY_LOCAL_MACHINE/SOFTWARE/Policies/Microsoft/Windows/System
3. Right-click in the right-pane and select New DWORD option.
4. Name the New DWORD as HiberbootEnabled and make sure its value is 0 (which will be 0 by default).
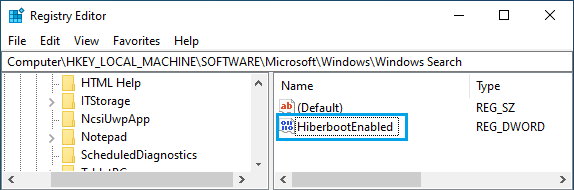
5. Exit Registry and restart the computer to implement this change.